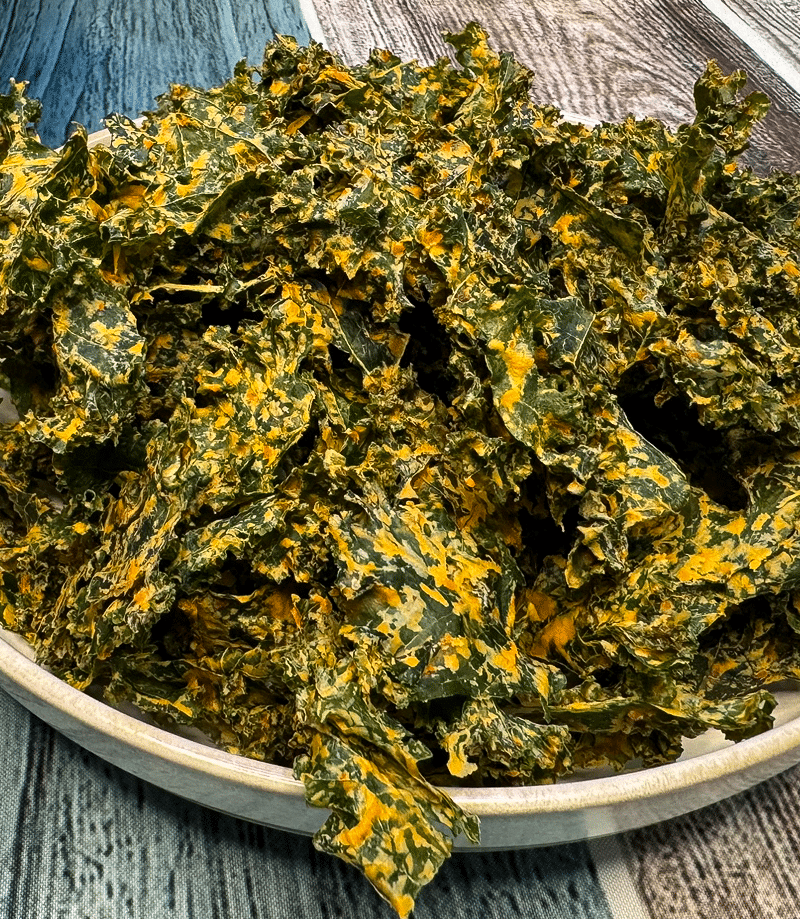
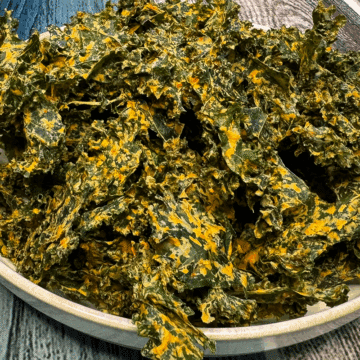
Crispy. Cheesy. Addictively snackable. These Homemade Cheesy Kale Chips are the snack you didn’t know you needed, but once you try them, there’s no going back. Seriously, guys, they’re THAT good.
We’re talking crunchy kale leaves coated in a creamy, dreamy cashew “cheese” sauce, then dehydrated (or baked) until they’re perfectly crisp. And the best part? They’re secretly healthy, but taste like you’re munching on a bag of nacho chips. Win-win!
Why This Recipe Works
- Healthy but indulgent: You get the vibe of cheese chips without the dairy or guilt.
- Simple ingredients: All pantry staples, nothing fancy.
- Versatile cheese sauce: It’s not just for kale—use it on pasta, veggies, or as a dip.
- Snack attack approved: They’re portable, crunchy, and basically the perfect Netflix binge buddy.
Jump to:
Want to Save This Recipe?
Enter your email & I'll send it to your inbox. Plus, get great new recipes from me every week!
By submitting this form, you consent to receive emails from Went Here 8 This.
My Take on Cheesy Kale Chips
Okay, I’m all about a good kale salad, but let’s be real—kale was destined to be eaten like THIS. Tossed in a creamy, tangy cashew “cheese” sauce and baked (or dehydrated) into perfectly crispy little bites of joy. 🥬
These kale chips are the kind of snack that taste indulgent, but secretly do your body all kinds of favors. Basically, it’s snack-time sorcery.
While this recipe is designed for a food dehydrator, don’t worry if you don’t have one—you can totally make them in the oven, too. That said, if you do decide to invest in a dehydrator, the possibilities are endless. From fruit leathers to veggie chips, it’s a total game-changer for creating healthy snacks the whole family will love.
👉 Check out some of my favorite dehydrators on Amazon to get started!
Make it a Meal
Sure, you can crush these kale chips straight out of the container (no judgment—I do it too), but they’re also amazing as part of a spread. Try pairing them with:
Or serve alongside your favorite sandwiches or wraps for a crunchy upgrade.
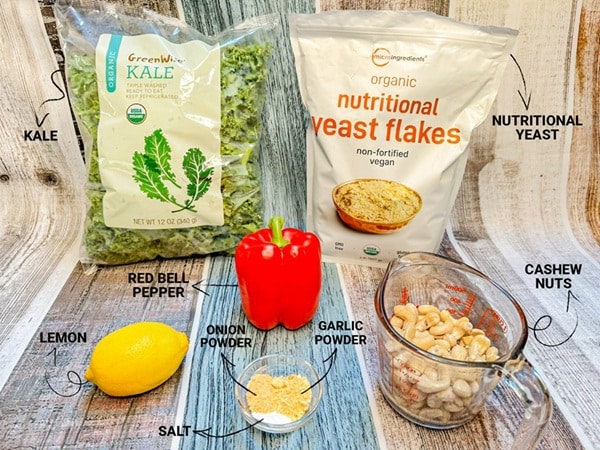
Ingredients
The full list of ingredients and amounts can be found in the recipe card at the bottom of the post.
Step By Step Instructions
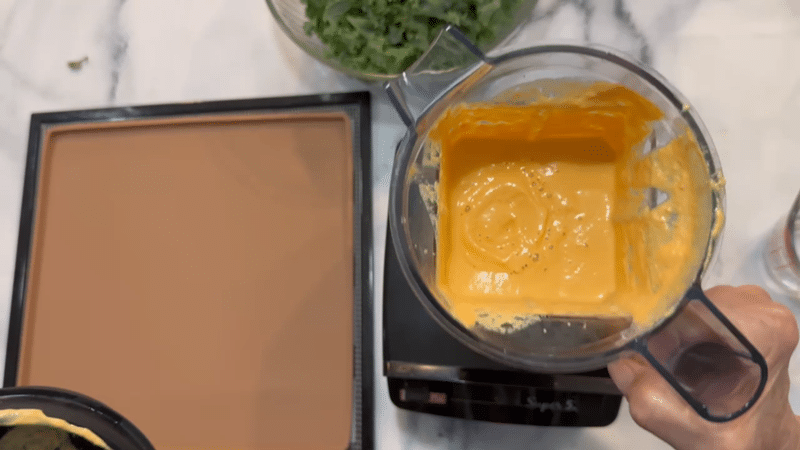
Step1: Place all the ingredients except the kale into a blender and blend until smooth and creamy. Adding water as needed until you get a cheesy texture.
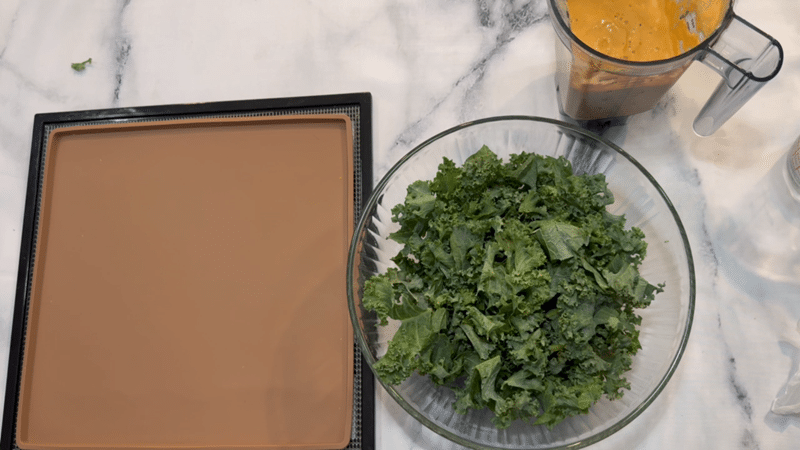
Step2: Sort through the kale and remove any stems. The stems will be hard and not edible.
Step3: Wash the kale and dry thoroughly if not previously washed.
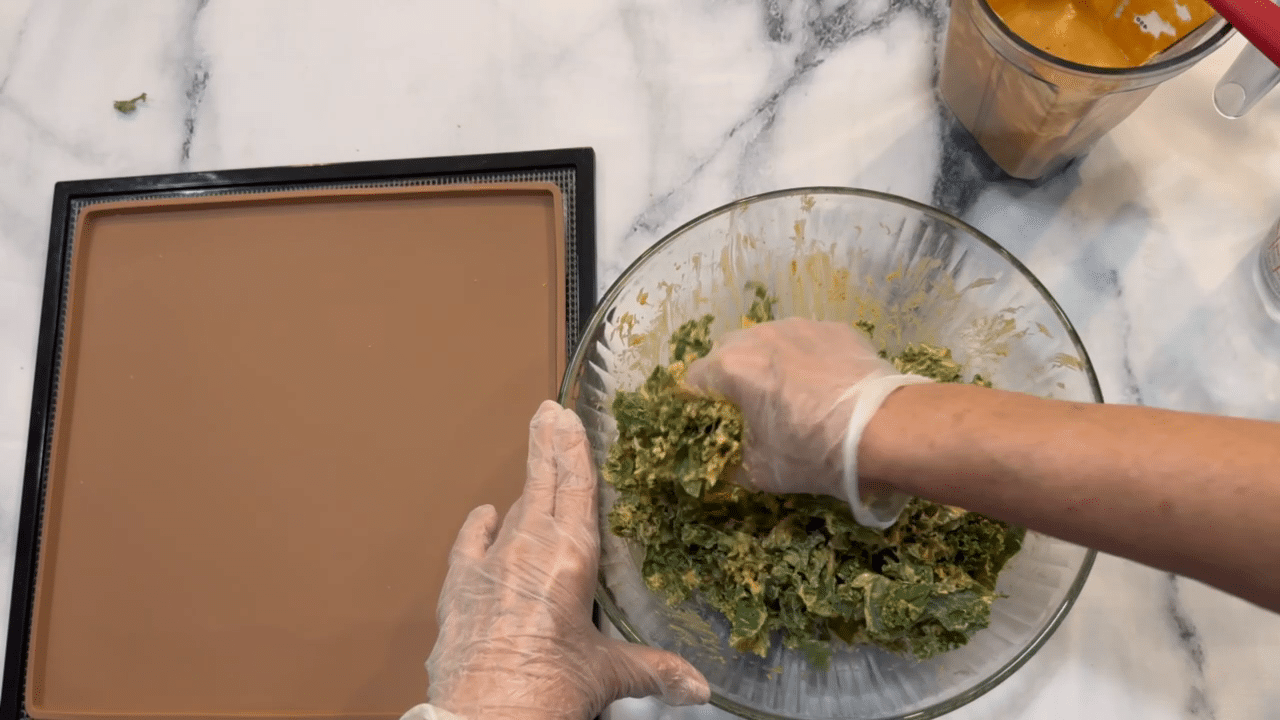
Step4: Pour the cheese sauce over the kale until fully coated, massaging it into the kale.
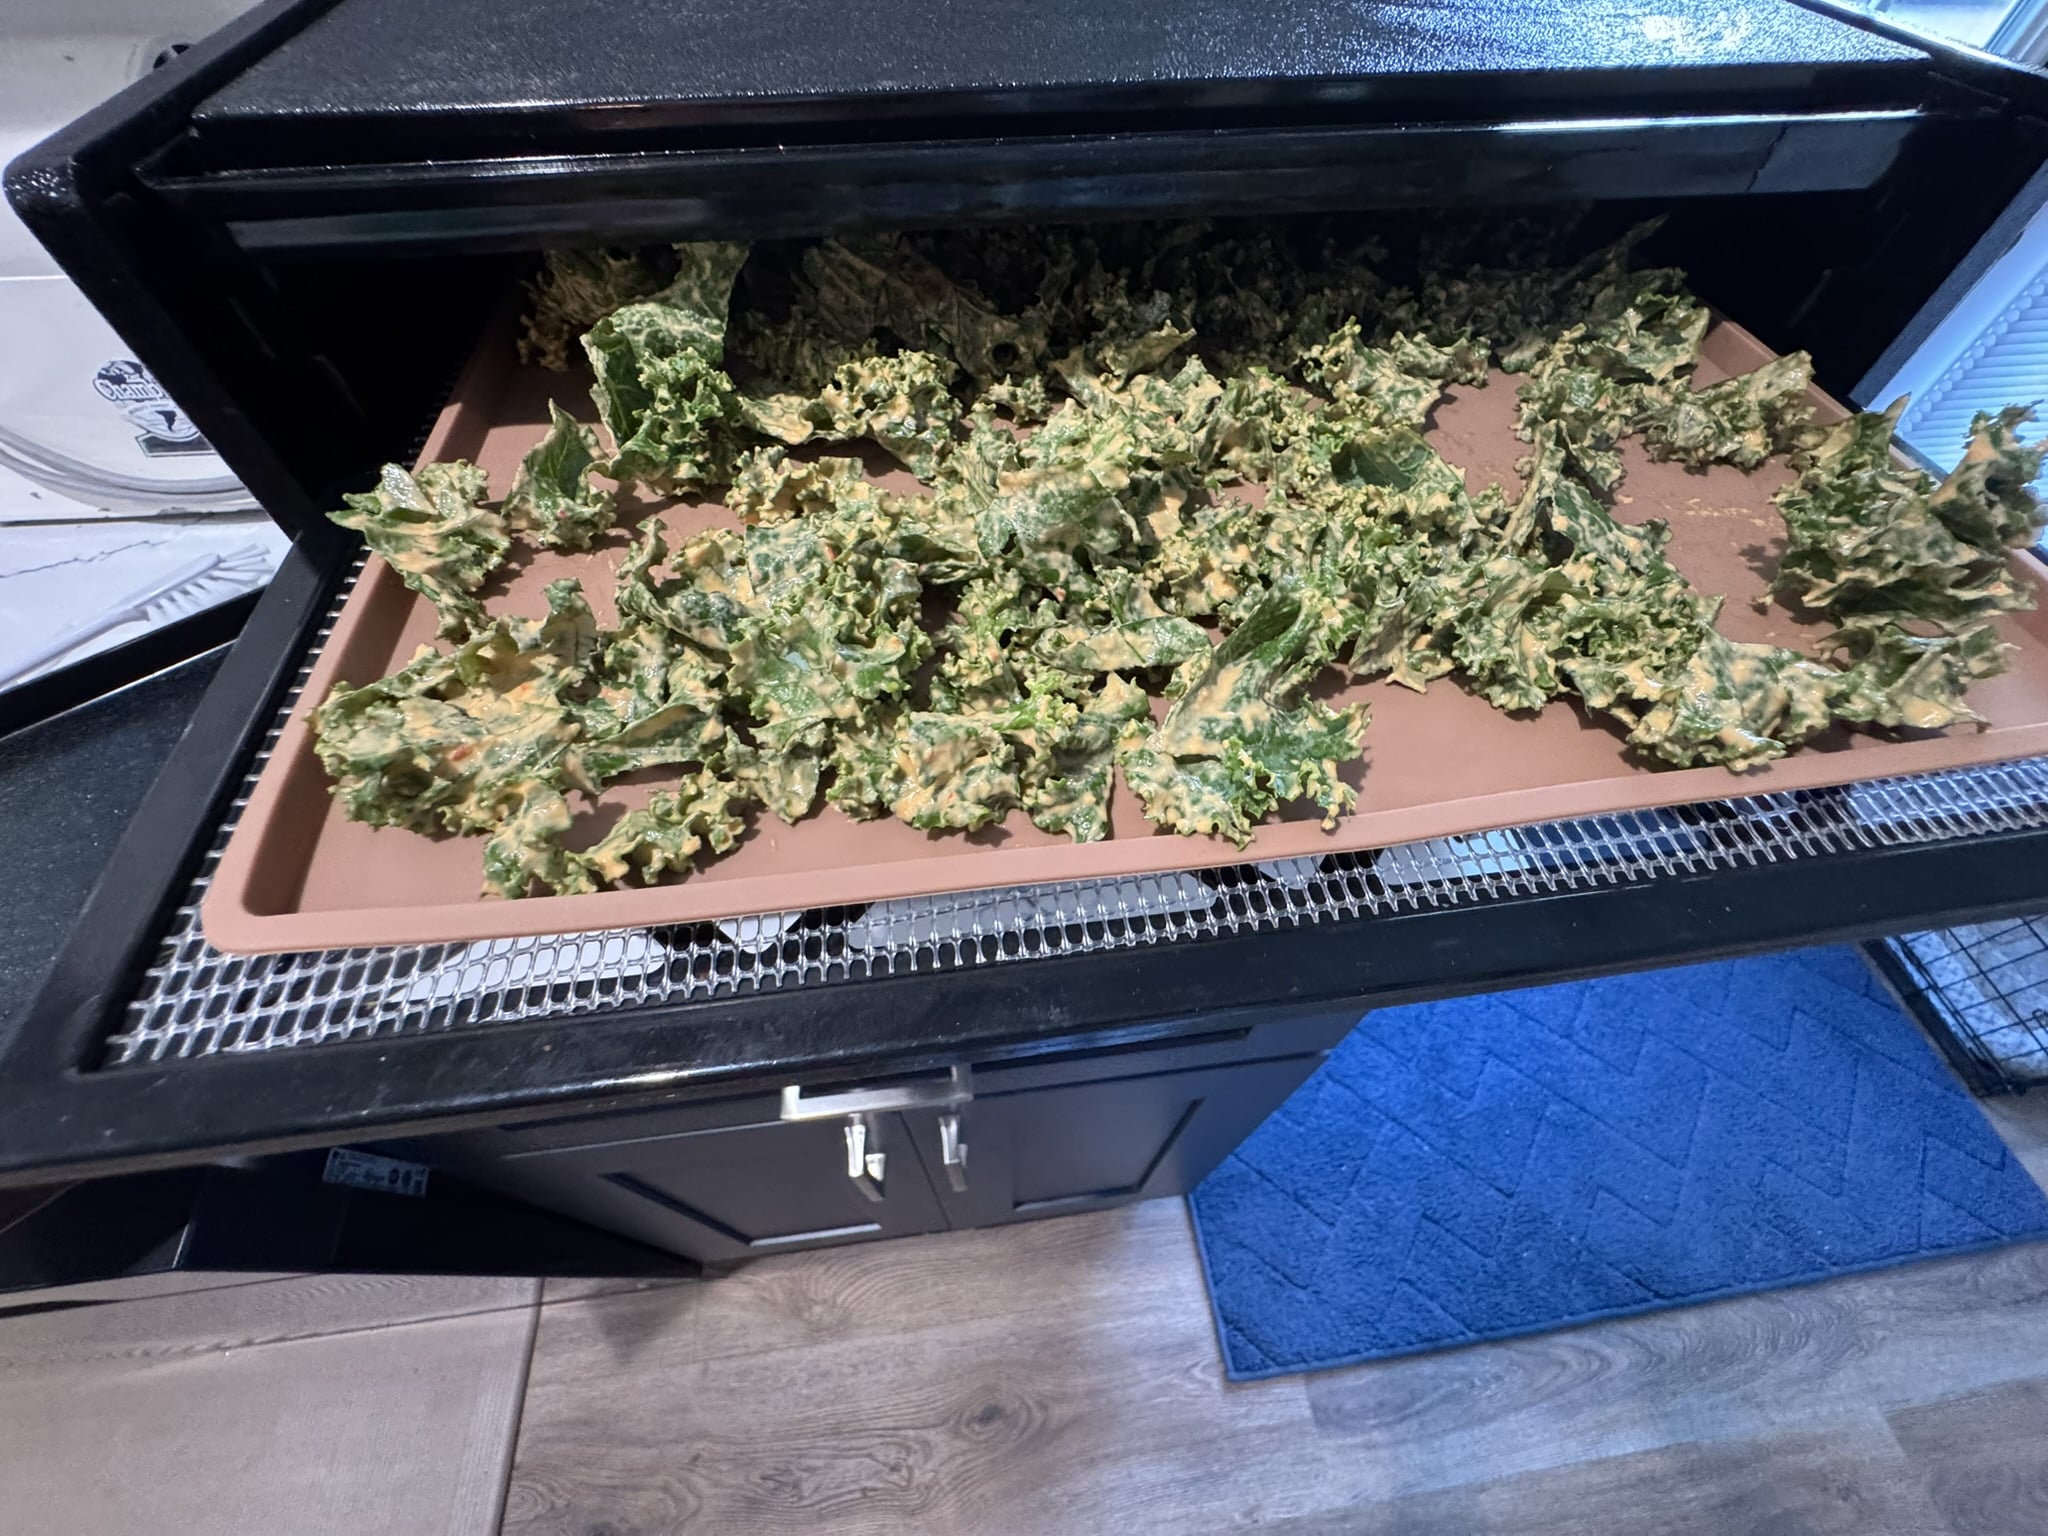
Step5: Place kale on dehydrator sheets. Make sure the kale does not touch each other. Set the dehydrator at 130° F (50° C) for about 10-12 hours or overnight.
Step6: Test the chips after about 6 hours for crispiness. Keep in the dehydrator until they are nice and crispy. Time will depend on the humidity in your area.
Step7: Cool completely and store it in an airtight container. Depending on your humidity, they will last a week if you don’t eat them up on the first day or two!
Expert Tips
- Dry your kale really well—any moisture = soggy chips.
- Don’t overcrowd your dehydrator or baking sheet. The chips need space to crisp up.
- Store in an airtight container with a paper towel to absorb extra moisture.
- For extra spice, add more cayenne or even smoked paprika to the sauce.
- Test for doneness early—you don’t want bitter, burnt kale.
Common Questions
If you want creamy sauce, yes. If you’re in a rush, a high-speed blender can get away without soaking.
The yeast gives that “cheesy” flavor, but you can substitute with parmesan if you’re not vegan.
Totally! Just wash, dry, and de-stem it first.
Storing Instructions
Cool completely before storing in an airtight container. Depending on humidity, they’ll last about a week (if you don’t eat them all the first day—which is honestly the bigger problem).
👉 Ready to upgrade your snack game? Try this Cheesy Kale Chips Recipe and let me know if you become as obsessed as I am!
Recipe
Homemade Cheesy Kale Chips
Ingredients
- 1 cup cashew nuts soaking for a few hours will create a smoother sauce
- 1 Red Bell Pepper you can use yellow or orange
- ⅓ cup nutritional yeast
- 1-2 tablespoon Lemon juice
- ¼-1/2 cup water to get the right consistency (- thick but creamy)
- 1 teaspoon Salt
- 2 teaspoon Onion powder
- 1 teaspoon Garlic Powder
- ½ teaspoon Cayenne Pepper optional
- 12 oz Kale washed and ready to eat
Instructions
- Place all the ingredients except the kale into a blender and blend until smooth and creamy. Adding water as needed until you get a cheesy texture.
- Sort through the kale and remove any stems. The stems will be hard and not edible.
- Wash the kale and dry thoroughly if not previously washed.
- Pour the cheese sauce over the kale until fully coated, massaging it into the kale.
- Place kale on dehydrator sheets. Make sure the kale does not touch each other. Set the dehydrator at 130° F (50° C) for about 10-12 hours or overnight.
- Test the chips after about 6 hours for crispiness. Keep in the dehydrator until they are nice and crispy. Time will depend on the humidity in your area.
- Cool completely and store it in an airtight container. Depending on your humidity, they will last a week if you don’t eat them up on the first day or two!
Expert Tips:
Expert Tips
- Dry your kale really well—any moisture = soggy chips.
- Don’t overcrowd your dehydrator or baking sheet. The chips need space to crisp up.
- Store in an airtight container with a paper towel to absorb extra moisture.
- For extra spice, add more cayenne or even smoked paprika to the sauce.
- Test for doneness early—you don’t want bitter, burnt kale.
- The cheese sauce can be used for mac and cheese, as a sauce over broccoli, as a dip, etc.
- If you don’t have a dehydrator, you can use an oven. Place the kale on a baking tray and bake at 275° F( 135° C) for about 25 minutes – flipping over halfway through.

manus pricing says
This recipe is amazing! The crispy, cheesy kale chips are so addictive and healthy. The instructions are clear, and the tips are super helpful. Definitely trying this again!
Tara says
I am glad you enjoyed the recipe, my family loves them as well!